Monday, December 17, 2012

IMPORTANT

I am not updating this blog anymore. (Wohooo, after almost a year of silence THAT was a big surprise, right?!)
If you would like to catch up with me I would be totally thrilled if you visit my new site ursulamarkgraf.com

There is a blog section, too *YEAH* And today I have a little pre-Christmas-present for all chrochet fans out there: a free tutorial/ pattern on how to make these crocheted gingerbread-house tags:


So come on over and say "hi" - I am so happy to have you!!!

Friday, November 16, 2012

Calling US-crafters

It has been so quiet here in so long. I have some big news to share ... will do so next week and let you all know.
Even though I did not write here in months *shame-on-me* I do still get lovely comments and emails from amazing people. And recently someone asked me whether I could tell her where to order straw for crafting online to make the straw stars for Christmas with this tutorial.

Unfortunately - as I live in Germany I could not tell her where to get crafting straw - or whatever it might be called - in the US.

So this is a call to all of you based in the US - anyone know where to order straw for crafting online?

Any help would be greatly appreciated!!!

Tuesday, October 25, 2011

My very first quilt *wow*

Maybe some people remember that I shared some  


a LONG time ago.

When I say long, I REALLY mean long! ;-)

The blocks were supposed to be for a blanket for my little boy and I actually intended to give it to him for his first birthday. 
Which was last year!
So this year when his second birthday came up I had just gotten a new sewing machine - which I had to test so I would know whether I want to keep it. And really really wanted to get this whole thing finished.

So I did!
YEAH!


Well, not quite yet. I could not quilt the blue squares yet, because some little bugger sweet boy ;-) stole and hid my blue quilting thread. 
He really seems to like all my crafty tools and material ... maybe I should just give that to him instead of a quilt ...
 
Now I gotta order new one - cause he does not tell me where he put it - to get everything done. *sigh*

Also I do not yet have a real clue how to finish the binding. I was thinking to just use bias tape - the slightly wider variety.
Can anyone tell me whether this is a really stupid idea?

To be honest, I really have no idea what I am doing here. I have read quite a bit about it ... but everone seems to do the binding differently somehow ...

*

And I wanna add a big thanks to  


Without you, I surely would have never ever even thought about making a quilt. 
So that I made this - and I am freakishly proud of myself that I did! - is pretty much thanks to you. 
I know, it is not an I-spy-quilt. But now I know I can do it. And the I-spy-squares are still waiting to be used. ;-)

Wednesday, October 12, 2011

Enough of the quietness - and Fairy birthday inspiration

I have not posted in soooooo long!!!!

And to be honest - there was not really a good enough reason for such quietness on my part. After the last post things got busy. But not more than usually. And I was used to going back and forth between times of business and times of more quietness ... 

So I waited for the more "quiet" time to start. 

And waited ... and waited ... and waited ... 

Weeks passed and I realized that this is not a busy phase ... this is it! It kinda freaked me. I missed posting here. But I hardly managed the German blog ... and everything else. I kept telling myself ... oh, I will write something next week. But that never happened as there were new things always going on ....
So, all I can say - I have missed you guys! Seriously! 

And I am sorry for being so quiet for so long!

And especially thanks to some of you who checked in ... will get back to you!

I will try to start up again and write here. I love this blog of mine and I love hearing from you guys! I miss sharing things I make with you. And I also miss reading all your blogs. 

I will not be able to write as often as before and to be honest I still have no real plan yet how I will do it - maybe I try a "once the week" post or something. Not sure yet. I will have to figure it out along the way. 

I just realized if I wait until I have a plan ... it will never happen! *laugh*


So today I will start off and share a few of the things I made for the fairy birthday party of little bear (which was in summer).


First of course there was a huge 

fairy castle cake. :-)


And for the kids party there where 

toadstool mega-muffins 

And I had acutally sewn 

leaf shaped pillows

to sit on!
Talk about crazy and having no time! :-)


My daughter had wished for a 

birthday crown

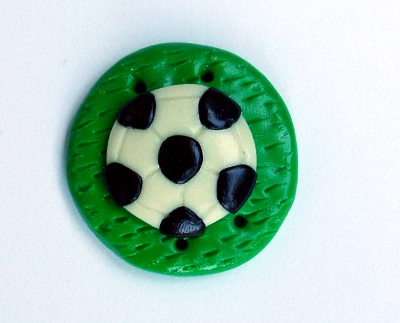
So I made her one out of felt ... decorated with some handmade heart-buttons:

 
"Feenkrone" is fairy crown in German. :-)

One of the buttons:


And last - but not least - there was a 

fairy! ;-)


I made her the 

fairy dress

according to her instructions! 
And believe me - a six year old can have surprisingly precise ideas about how her fairy dress has to look!!!!


I love her so much!


And huge thanks to Lorraine for helping me with making the dress!!!! 
Your input was unbelievably helpful!


Saturday, May 28, 2011

WINNERS

It is already very late so I am going to make this very quick. The two winners of the Sew Mama Sew Giveaway are
Kelly


and Laura

Congratulations!!!!

I have emailed both to let them know that they won.

There were so many comments ... I appreciated each and every single one of them!

And for all others that might be interested in my buttons:

To all orders that are placed until the 15th of June I will add a free toadstool button or toadstool sewing pin - your choice.

You can order buttons via my store Cutelicious - just send me a message and tell me what you like if it is not in the store right now. 
Or by emailing me directly 

cutelicious-shop [at] web [dot] de

I do realize the postage is quite high just to order some buttons. I am already only charging the actual postage price - nothing for wrapping or anything. If you like you can combine orders - maybe in your sewing groups people are interested? I can mail ALOT of buttons for that prize. :-)

Thanks again for playing along! :-)

Sunday, May 22, 2011

Sew Mama Sew Giveaway Day

I know I am posting this early ... but I figured rather too early than too late ... :-)

So finally it is here again - the Giveaway Day! 
As you read this I am probably sitting comfortably and checking out all the other awesome blogs and giveaways. :-)
I have been waiting and looking forward to this for quite some time. 

So ... as I know that you have many more blogs to visit I make it really short and easy this time. 

What can you win?

A set of costum-made buttons made with love by ... ME. Of course. :-) 

You choose the design or color or whatever you wanna choose. And I make them.
The set will include four buttons.

They could look like these ....


but they could also look totally different. 
Up to you!
Well, and me of course ... ;-)

If you are curious and wanna see more buttons I have made - or even wanna place an order - you can 

check out my store CUTELICIOUS


you can look at my BUTTON PHOTOS on flickr

or you can just email me: cutelicious-shop [at] web [dot] de


What do you have to do to win?

Easy - just leave a comment telling me what buttons you would like to have. 

I did not want to add this at first ... but here it goes:
If you just tell me "the buttons are nice" or "I wanna win them" it will not count for the giveaway! 
I think it is only fair to those people that actually read the post and entered! If it makes you feel any better of course you can change your mind if you actually win. I just would like you to think just for a minute about what buttons you would really love to have ... and maybe I get some new ideas out of this, too! ;-)


Could be some you saw in my shop or on my blog ... or just any other that come to mind ... maybe something you have been looking for but could never find ...

I will draw a winner with the help of random.org.
One entry per person!
If there are more  than 100 comments I will draw a second winner.
I leave the giveaway open until the 26th of May (German time). 
EVERYONE around the world can enter! 

You do not have to be a follower of my blog - but of course if you like what you see you are more than welcome to become one! :-)

And when you are done commenting hop on over to 


to check out all the other giveaway goodness!!!

Good luck and have fun!

Oh, and if by any chance you are German ... check out my German blog Cutelicious ... :-)

Friday, May 6, 2011

How to crochet a portable doll crib


After the post on the 


I have been asked whether I could give some guidelines on how to make the 


above. 
So here are some of my thoughts on it. 
This is not going to be a tutorial or pattern as I have made the thing quite some time ago and do not have enough time right now to try to recreate it. These are just some basic guidelines how I went about - you will have to figure the rest out for yourself. :-)
Hope this helps a bit though. 


1. I worked the whole thing in single crochet. I like to do it that way as it will give the "stiffest" result. I am not sure whether double crochet might also work though.

2. For the base of the doll crib I just crocheted a rectangle. I basically started at one of the shorter sides. I crocheted a chain as long as I wanted this side to be. (Get the doll that is supposed to sleep in there and use that as a "measure".) Then I just added rows to this until the rectangle was slightly "longer" than the doll supposed to be in there.

3. Then I added the sides of the crib. I simply did it by starting to crochet the sides directly to the rectangle base. I just started to single crochet into the upper loop of every single crochet around the whole rectangle.
(Does that make any sense to you?)
Make sure that you do not increase at the corners - or anywhere else for that matter - as you want your sides to go "straight up". 
You could probably also just crochet rectangles again to make up the sides and join everything by sewing it together. I suppose that would work as well.

4. The handles - well, I made them with a certain technique that I had read about. I have no idea what it is called. Basically I crocheted a chain as long as I wanted the handle to be. Then I turned the chain a bit and crocheted single crochets into the BASE loop of each chain. (You usually do not crochet into that loop.) You can add a second regular row - or as many until your handles are "wide" enough. By doing it that way your handle will not be just a narrow rectangle but it will curve slightly - which I liked. 
But if that description does not make any sense to you, you could also just crochet narrow rectangles and use these as handles. 
I just sewed the handles to the sides. 

And that was it!
It cost me the most time to fiddle around to get the base rectangle to the correct size ... the rest worked up quite quickly. 

Hope this helps anyone a bit.
If you are making a doll crib - please let me know. Would make my day! :-)

And if there are any other questions just ask! I am happy to answer.
And if it takes a bit - I am sorry. I try my best to not take TOO long ...

Thursday, May 5, 2011

Custom order of buttons

Just wanted to share a custom order of buttons I did before Easter.
(This has already been sitting in my draft folder for days ... almost forgot about it ...)

EDITED: After the first lovely comment I realized that I did not bother taking any pictures with a coin or something to show how big these are. These are actually not tiny at all. They are quite big ... I think about 3,5cm in diameter. Is that about 1,5inch?)

The first button is my favourite. I almost "forgot" to package it up when I got the order ready to send ... ;-)


The mane of the horse is made out of white polymer clay with glitter.
Unfortunately one can not really tell from the photo.


These are the other big buttons I made.
They are for decorative purposes only and are gonna be sewn to the fabric at the side.


A soccer button.


And another one ... this time it glows in the dark. :-)


A pirate button. Also glow-in-the-dark.


And another horse - in pink and with glow-in-the-dark mane.


Some ghost buttons ... 


and some birdhouse/ cuckoo clock buttons.

Cause little bear had seen the horse buttons, I will have to make some more. She already wanted to keep these and when I explained to her that these are going to be sold she said
"You can sell all the other ones. These are mine."
Well ...
I did have some explaining to do until she understood that this is not how custom orders work. ;-)

Sharing this with these fun parties

Photobucket Making The Girl Creative Sumo Sweet Stuff Tip Junkie handmade projects
 

Tuesday, April 26, 2011

Sewing an Unicorn

Or how to make a 5year old happy! ;-)

When I asked my daughter a few weeks ago what she wanted for Easter, she said

"An unicorn. A white one with a pink horn and a green saddle."

Well ...

I actually already had other plans ... but why had I asked?!
My own fault!

So I ended up ditching my plans and making a unicorn:


I used the pattern for a stuffed horse and added the horn.
I am really happy with how it turned out.
And considering that I have never made a stuffed toy with a sewing machine before I was quite impressed with my own work. :-)

I made the unicorn out of white corduroy-velvet and used pink cotton velvet for the ears and the horn.


The bridle is made out of beautiful ribbon. 
And of course it can be taken off.


The nostrils are embroidered pink flowers.
I made the eyes out of polymer clay. Kinda like buttons.
Instead of white dots I made tiny pink hearts and added them to the pupils.
After all it is a very special magic unicorn. ;-)


The saddle is made out of thick green felt with some ruffles around it.
I actually had planned to add some flower-heart-garland kinda embroidery to it as well ... but simply ran out of time.
But maybe it was for the better. I quite like how it looks now ... maybe it would just have been too much. Or I would have messed it up after all. ;-)


The saddle of course can be removed as well. 

Little bear LOVED it!
She was so happy! Which again made me so happy!
Because in the end I did spend some hours on making it ... and the whole time I was worried that maybe she would not like it.
She seemed to have a pretty clear picture in her head ... What if the unicorn I was making did not live up to it?
So I was relived and happy to see how she would not just smile but drag the thing everywhere she was going! :-)
Am so happy that I did not stick with the initial plans ... :-)


And another funny thing:
When she found the unicorn - of course it was hidden by the easter bunny -  she instantly turned to me and said "You sewed that!"
I mean she knows that I sew ... but still. That instant reaction ... I was puzzled. She did afterall still believe in the easter bunny. Why would she think that I had made it?
So I asked her. You know what she said?
She pointed to the ribbon that I had made the bridle out of and said "That was in the living room"
Yes, I do store my ribbons in the living room. I never thought that she would pay any attention to that. And  NEVER would I have thought that she would remember a particular ribbon!
I was speechless!

Hope all of you guys had a great Easter!!!!

Did you make any of your Easter gifts?

I am sharing this post with these parties:

Tip Junkie handmade projects Making The Girl Creative Katie's Nesting Spot Show and Tell Green The Trendy Treehouse Photobucket Party Button Stinkin Cute Thursday Button Somewhat Simple NightOwlCrafting  Photobucket
Related Posts with Thumbnails